IMPORTANT This documentation is for Panda 2 which is for PrestaShop 1.7 & 8.
Getting started
Basic information about PrestaShop 1.7: http://doc.prestashop.com/display/PS17/User+Guide
Basic information about PrestaShop 8: https://docs.prestashop-project.org/v.8-documentation/user-guide
PrestaShop System requirements: https://www.prestashop.com/en/system-requirements
Layer slider documentaion: http://docs.webshopworks.com/layerslider
Bootstrap grid system: http://v4-alpha.getbootstrap.com/layout/grid/
Theme install
Prepare
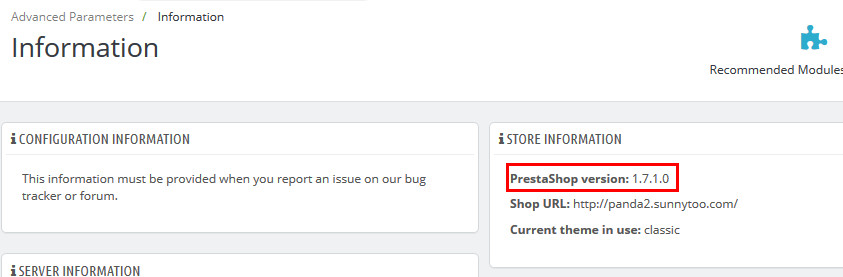
- The theme is for PrestaShop 1.7.1+ & Prestashop 8, Go to BO > Advanced Parameters > Information page to check if the version of your PrestaShop is larger than 1.7.1.0.
- Backup PrestaShop files and the store database. This is very important.
- If you are going to install the theme on a live site, then you need ot enable maintenance mode to disable your site during the installation process.
Install
If this is your first time to isntall the theme, then install the "/Prestashop1.7/panda.zip" file, no need to applly the update2.x.x.zip file.
If you have installed the theme and the version of your "Theme editor" module is lower than the "/Prestashop1.7/update2.x.x.zip" file, then follow this guide to upgrade your theme to the latest version.
Here is a video guide: https://youtu.be/_QXtPY50OPw
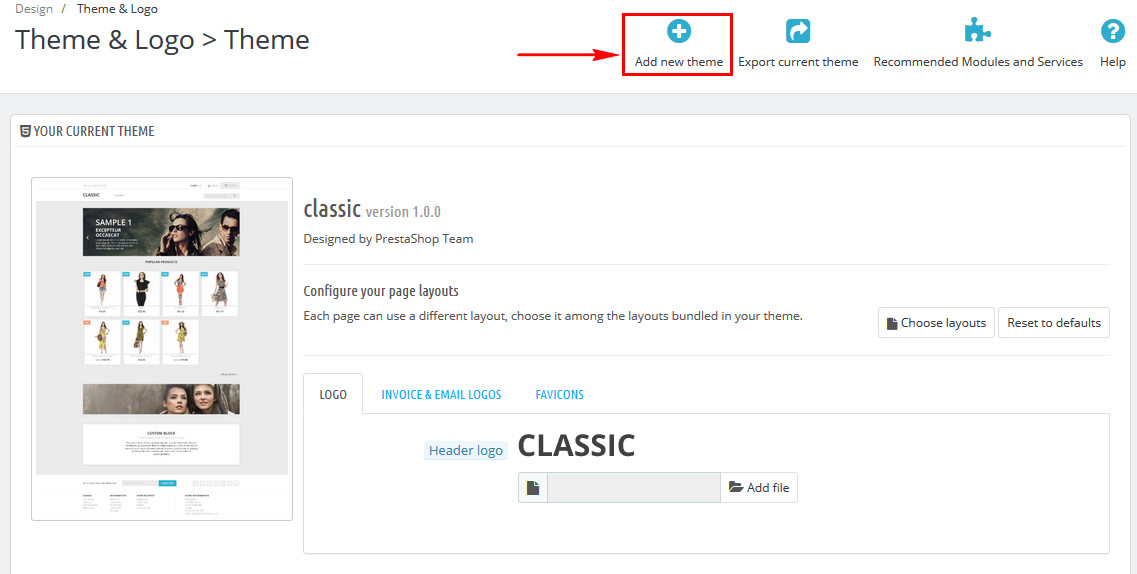
- Login to your back-office and navigate to the Design > Theme & Logo.
- Click on the Add new theme button on the top toolbar.
- In the "Import from your computer" section, click on the "Add file" button to select panda.zip and upload. Don't upload the main .zip file you downloaded from www.sunnytoo.com, unzip the main .zip file first, and then upload panda.zip.

-
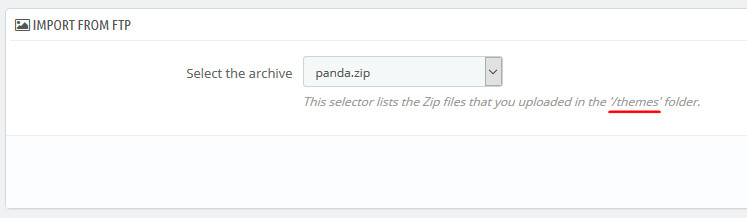
If you have problems uploading the panda.zip file, there are two solutions: (1) Ask your hosting company for help to incrase the 'upload_max_filesize' to at least 10 MB. (2) Upload the panda.zip file to the /themes/ folder using a FTP client or cPanel, and then install from the "Import from FTP" section.
-
Hover over the Panda theme on the themes list, and then click on the "Use this theme" button.

-
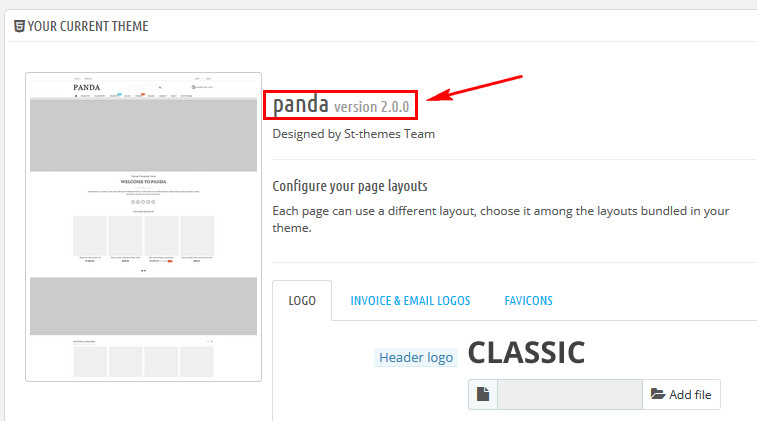
After a while you will get a page like this, which means the theme has been successfully installed.
-
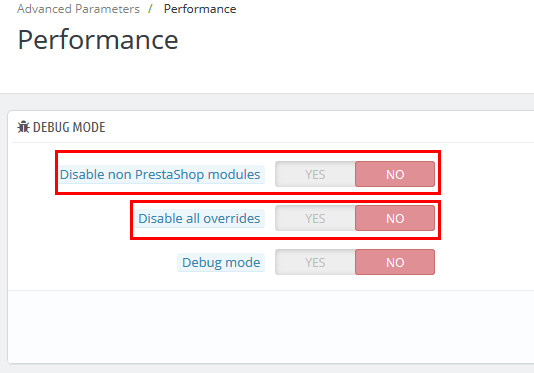
This step is important, go to Advanced Parameters > Performance page, check if these settings "Disable non PrestaShop modules" and "Disable all overrides" are disabled, if they are not, disable them and save.
-
This step is important, go to BO > Modules > Installed modules > check if the "Overriding default behaviors" module is installed and actived, if it's not try reinstalling/activating it. If you can not get it installed/activated, please take these steps:
1. Check if the \override\controllers\front\CategoryController.php file exists. If it exists, make a backup of it, and then remove it.
2. Check if the \modules\stoverride\override\controllers\front\CategoryController.php file exists. Remove it if it exists.
3. Try activating the Override default behavior module again.
If it still can't be actived, take a look on this tutorial How to manually installed the override default behaviors module or contact us.
-
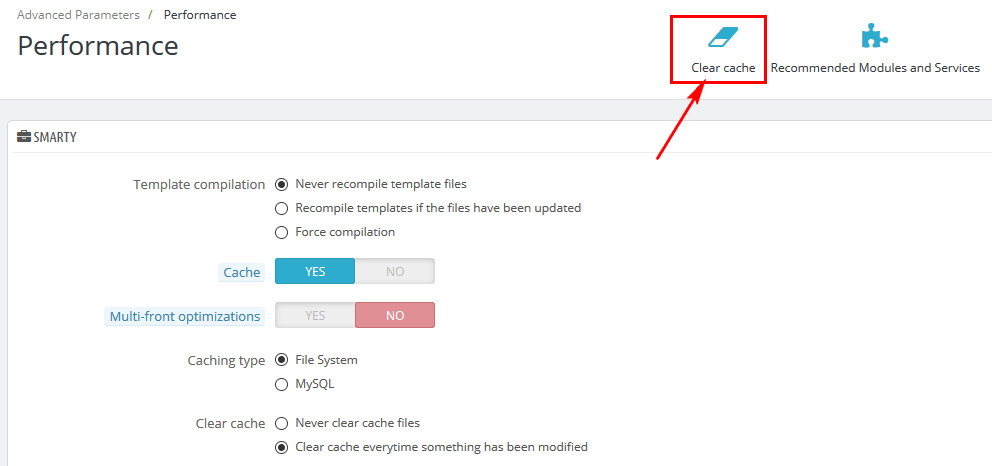
Clear the Smarty cache.
- Congratulations! You have successfully installed the theme!
Theme update
Important this is for update Panda V2.A to V2.B, not update Panda V1.X to Panda V1.X
The version of the theme is the version of the "Theme editor" module, not the version showing on the "BO>Design>Theme" page.
- Backup PrestaShop files and the store database. This is very important.
- If you have changed some theme files, you have to manually merge your changes into the update files. A free software called WinMerge might help.
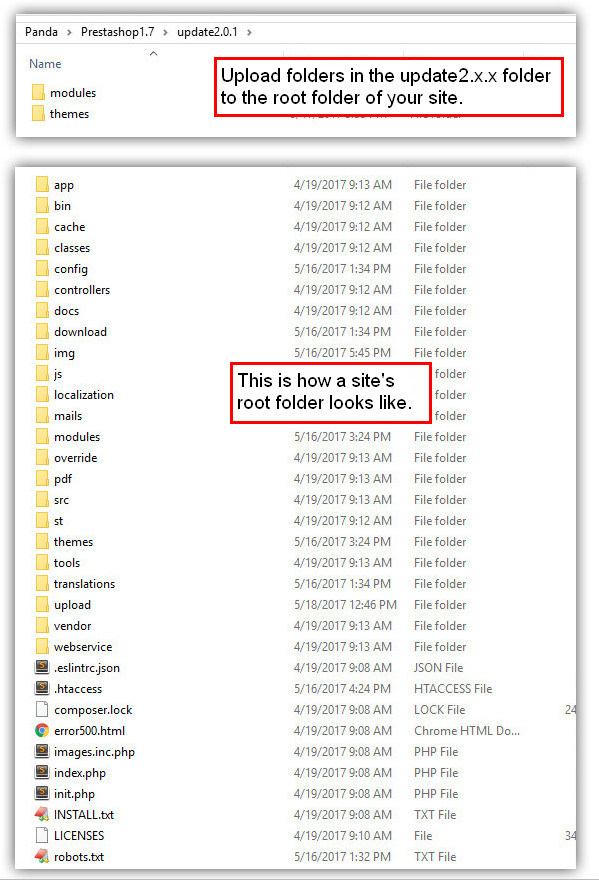
- Unzip the update2.x.x.zip file, and then upload folders in zip to the root folder of your site via ftp.
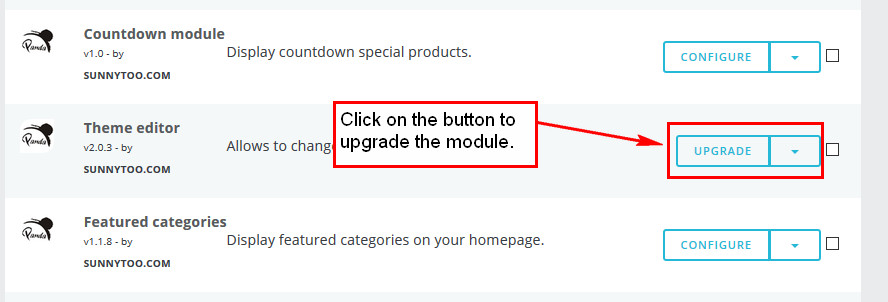
- Go to BO > Module > Installed modules page, check through all modules of the theme, upgrade ones with a "Upgrade" button. Like this one:
- Clear the Smarty cache.
- Congratulations! You have successfully upgraded the theme!
Image dimensions
The theme does not require image types to be certain sizes. I will use the main demo store as an example to expain how to set image dimensions to make images look sharp. Here are the dimensions of images we used on our main demo store.
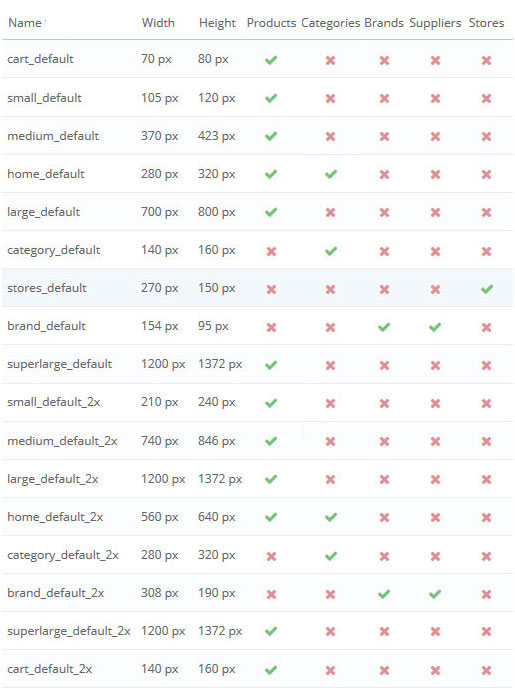
- To know the ratio of your product images. Product images we prepared for the main demo store are 1200px in wide, 1372px in height, so they have a 1200:1372 ratio. It's highly recommended to make all product images have a certain ratio, otherwise PrestaShop will automaticly fill white color around them.
-
The theme allows product images in differnt blocks having different sizes. Let me use the "Featured product slider" module as an example, you can find a recommended width for the module on the back end.

- Use the recommended width (280) and the ratio (1200:1372) to get the hight. 280*1372/1200=320.133, round it to get the height 320. If you get 320.5, then the height would be 321.
- Please check if you already have an image type which is 280x320, if yes, choose it. If no and all product images on your site are in the same size, then you can change the size of an existed image type, generally home_default. If you have several differnt sizes, then create a new image type for products, name it whatever you want, just be sure it ends up with _default, if you enable the retina option, then create another image type with the same name, but ends up with _default_2x.
Generally you don't need to chanage the width of "cart_default" and "small_default".
PS no way to make images on fullscreen blocks look sharp, cause the width fullscreen block are different on different devices, it could be any number, like 1660, 1920, 2100 ...
One click demo importer
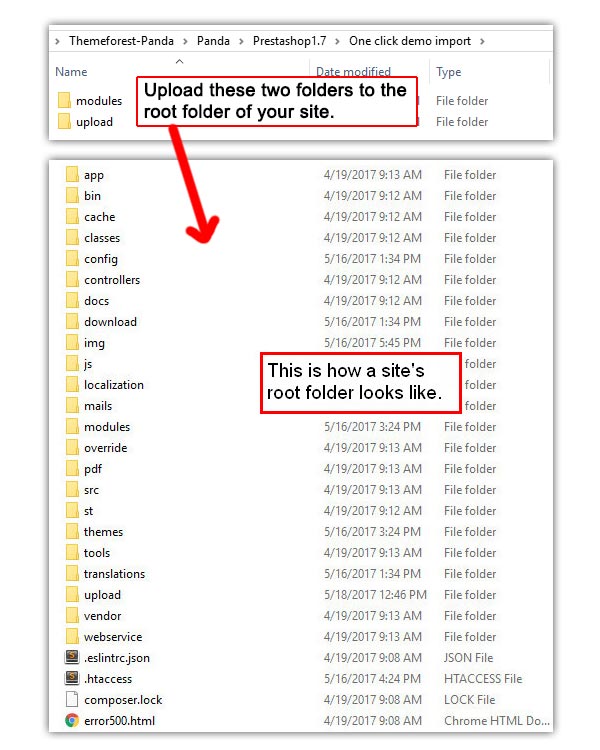
- IMPORTANT Upload the "modules" and "stupload" folders in the "One click demo import" folder, which you can find in the main .zip file you have downloaded from www.sunnytoo.com, into the root folder of your Prestashop installation.
- Click "Demo x" buttons in the Theme editor module to import predefined demos. You have two choises, one is importing all data, another is improting colors only.
- "Featured categories slider" module and "Product slider for each category" module can not be expored/imported, because of categories are differnt from sites to sites.
- Sample accounts will be appied to these modules "Facebook page plugin", "Twitter Embedded Timelines" and "Instagram block", so you are going to use your account instead after importing.
PrestaShop 1.7 & 8
PrestaShop update
You can use the "1-Click Upgrade" module to upgrade Prestashop. After you successfully upgraded your site, please go to BO > Advanced Parameters > Performance page, check if these settings "Disable non PrestaShop modules" and "Disable all overrides" are disabled, if they are not, disable them and save.
CSV import
Sample CSV files provided by PrestaShop are stored in the /docs/csv_import folder of your installation of PrestaShop, but 3 of them are not correct missing several columns, We've corrected them and put them in the /csv_import/ folder in the main .zip file.
Tips of using PrestaShop
1. How to configure modules in new tabs?
Currently if you are unable to configure modules in new tabs, it is not convenient if you want to configure several modules at the same time. Here is a trick, you need to edit the \src\PrestaShopBundle\Resources\views\Admin\Module\Includes\action_menu.html.twig file for a little bit. Repalce all <form to <form target="_blank"
2. One thing you need to do after choosing layouts for pages.
Back up the \app\cache\prod\themes\panda\shop1.json file or the \app\cache\dev\themes\panda\shop1.json file after you choosing "Full width" or "Two columns, small left column" or "Two columns, small right column" for your pages, because of you may loose your settings afeter clearing the Smarty cache.
3. How to speed your site up?
- Go to BO > Advanced Parameters > Performance > Set "Template compilation" to "Never recompile template files" and Enable cache.
- On the same page, disable "Debug mode", enable all settings in the "CCC" section.
- Adding at least one media server to your site would dramatically speed up your site.
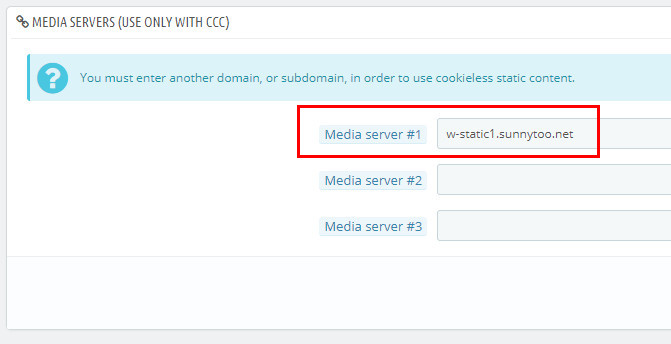
You may ask what's that "w-static.sunnytoo.com", how can I get my own one?
"w-static.sunnytoo.com" is just a sub-domain, once you bought a domain, you can create as many sub-domain as you want. Generally a sub-domain would take some time to work after creating, to check if it works, you can upload an image(named as 123.jpg) to the root folder of your site, try if you can reach the file via http://the-sub-domain-you-just-created/123.jpg, if yes, then it's a correct one.
Don't add media servers to your site if it's under maintenance.
- Disable(not uninstall) modules you do not use. Here are a list of Presatshop's native modules we disabled.
- Shopping cart
- Newsletter subscription
- Search bar
- Currency block
- Language selector block
- Link List
- Contact information
- Customer reassurance
- Main menu
- Featured products
- Social media share buttons
- Custom text blocks
- Social media follow links
- Image slider
- My Account block
- Banner
- Customer "Sign in" link
- Customer accounts
- Newsletter
- Browsers and operating systems
- Best suppliers
- Pages not found - This module is useful when your site is not stable.
- Registered customer information
- Welcome
- Best vouchers
- Best customers
- Best categories
- The theme comes with 50+ modules, you do not need all of them, so disable those ones you do not need, here are a list of modules you can not disable.
- Theme editor
- Overriding default behaviors
- If you use blog, then "Blog module" and "Blog editor" are also can not be disabled. If you do not use blog, you can disable all blog modules including those two.
4. Maintenance.
If you are going to put your site in maintenance mode, then do not forget to add your IP address to the "Maintenance IP" field, otherwise some features on back office can not work fine.
Theme settings
Positions
It's important to know all positions so you can easily change blocks postions to make them the way you wanted.
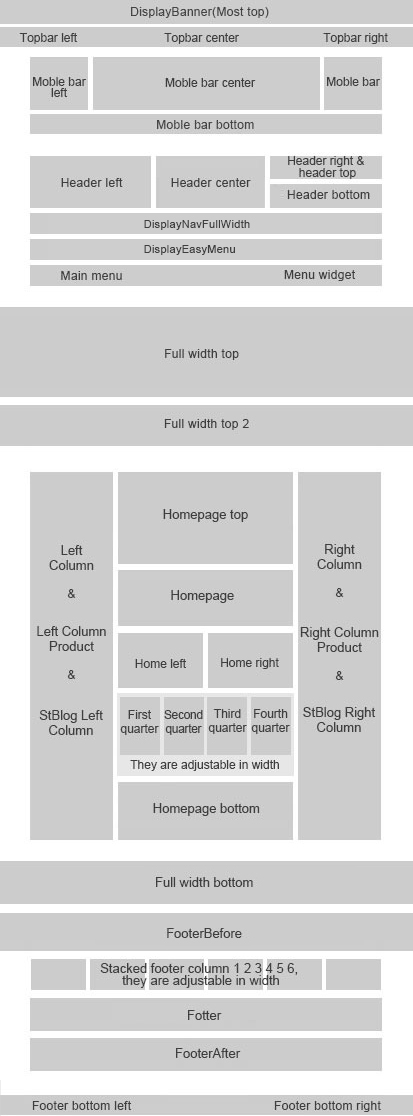
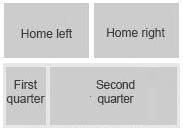
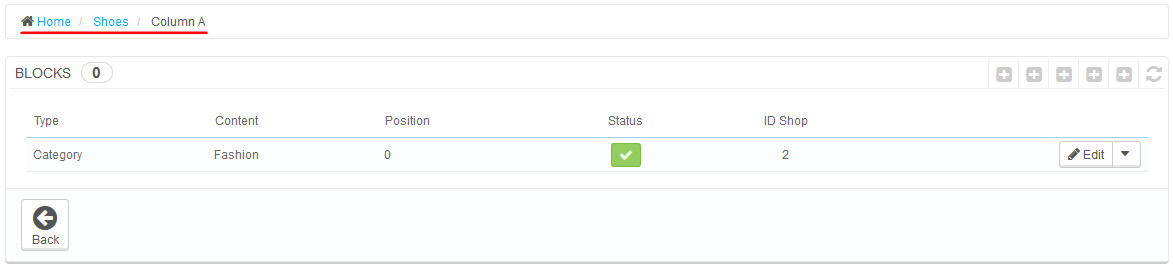
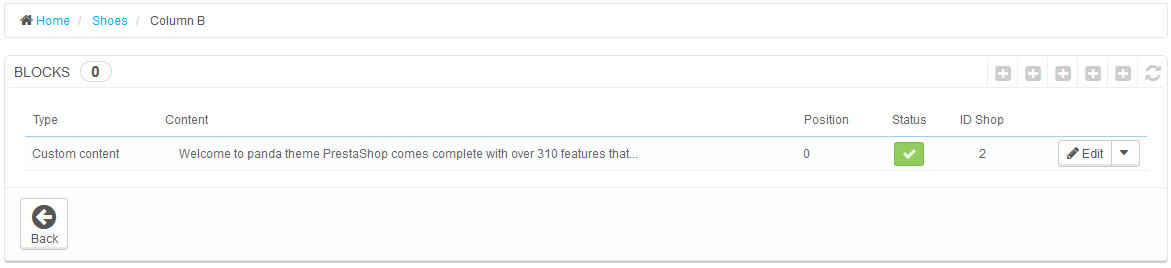
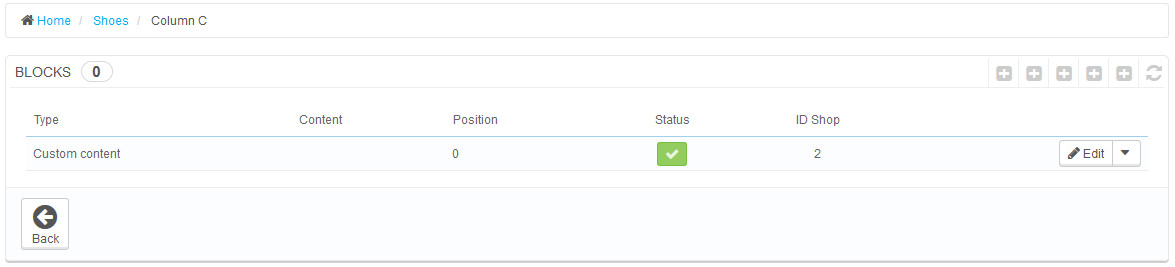
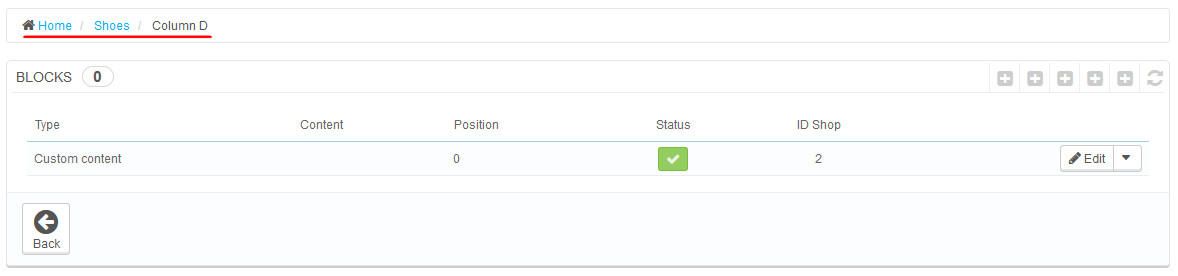
First quarter to Fourth quarter and Stacked footer column 1 to 6, they are two group of special positions, because of the width of them are adjustable by using the Theme editor module. For example you can have a block like the following small image by setting the "First quarter" to 3/12 in width, the "Second quater" to 9/12 in width and the reset two quarters to 0.
Speaking of stacked footer columns, please take a look at the demo 3 and demo 4. Blocks can be stacked, so created a lot posibility.
Panda 2 modules
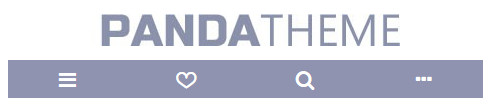
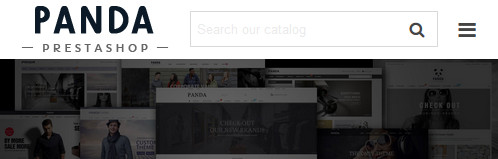
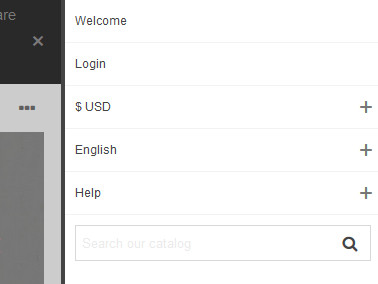
Sidebar and mobile header bar
-
The mobile header bottom hook is a little bit special, links in it would be streched, like this.
-
Search bar mod displays as a button by default, if you want to have a search box on the mobile heard, go to the Search bar mod, set the "How to display search box on mobile header" to "An input file".
-
The "Mobile nav - User center" is used to make the mobile version be neat and clean. It displays modules that transplated to the displayMobileNav.
Stickers block
The module gives you full control over native stickers and custom stickers, you can decide displaying native sticks or not.
- There are two types "Text sticker" and "Image sticker". If you have upload an image to a sticker, then the stiker becomes a "Image sticker".
- PrestaShop shows "New", "Sale", "Online only" out by default, if you do not want them, just delete or disable them from lists, no need to remove them product by product.
- Stickers do not show on the main image on the product page, because of they can not work fine with the zoom feature.
Notificationr
- This module can be used to display an notification to let visisters know that your site uses cookies. The module does not block prestashop and the theme using cookies. There are dozens of "Cookie law" module for prestashop, only one module blocks using cookies, other modules are just show a warnning.
- This module can also be used to display floating banners.
Love buttons
- If a customer loves a product from homepage and the category page, for cache and loading speed reasons we can not tell if the customer has already loved the product or not, so if the customer loved the product before, then the first click will be disregard. If the customer did not love it before, then the first takes effect. If the customer clicks the same love button again, then the second click always means unloving.
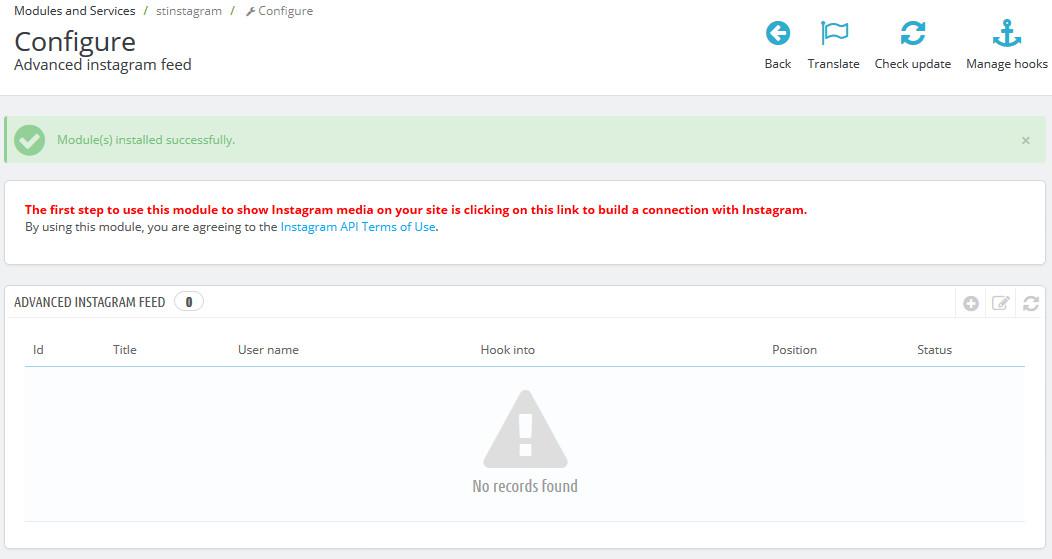
Advanced social feed for Instagram
- This module has permissions to get media from public content, which means you can display other users' media on your site.
- You can get media from Ins by usernames and hashtags.
- Media can be displayed in grid and slider layout.
- You can create as many blocks as you want to display media from different sources.
The first thing you need to do after installation. Click on the link marked in red to get an access token from Ins, and then you can get media from Ins.
If everything goes well, your account details will be displayed like this. A block will be automatically created to show your recent media on the top of your site.
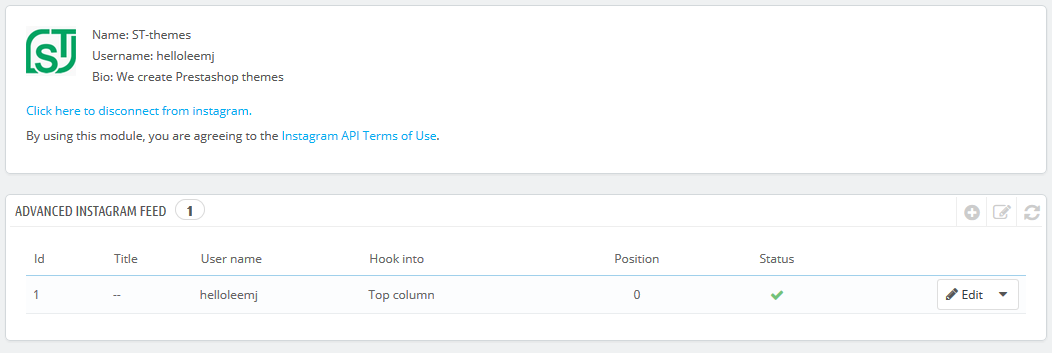
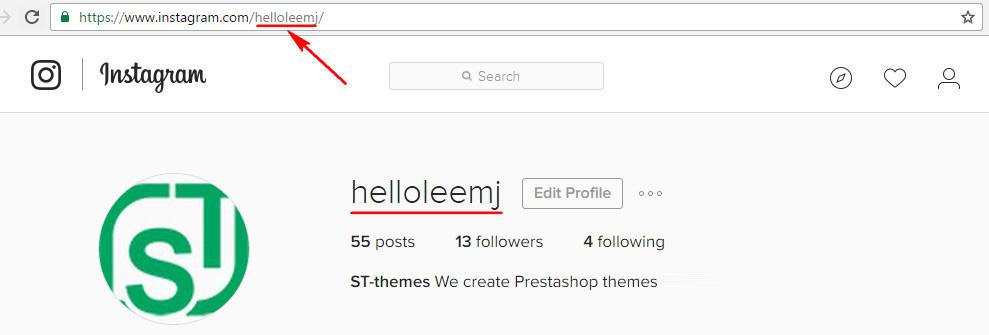
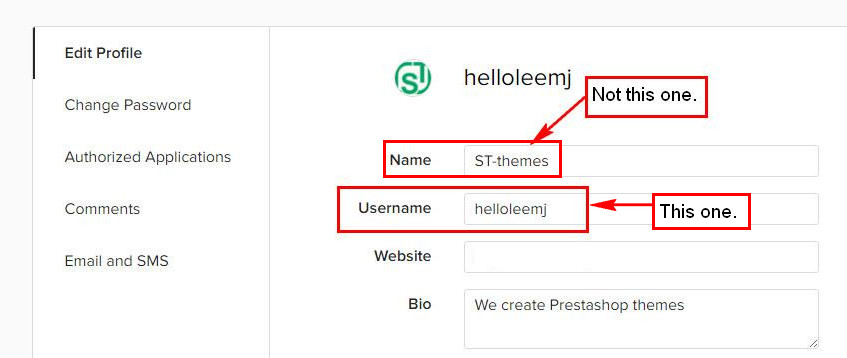
How to get username?
Username, not name. Fill in one username, currently does not support multi-usernames. You have to click on the button right under this field after changing username to check if the username you filled is validate and get user information from Ins. See the following two screenshots.
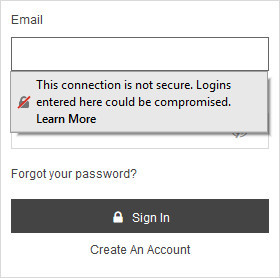
Customer "Sign in" link mod
The module has a quick login feature which looks like the image below, but you may get this message "This connection is not secure. Logins entered here could be compromised".
To get rid of it, you need to enable SSL. More info here: https://support.mozilla.org/en-US/kb/insecure-password-warning-firefox?as=u&utm_source=inproduct
Breadcrumbs
Besides showing/hiding breadcrumbs, adding background images to breadcrumbs, another important feature of the module is to set the gap between header and content. With the module you can set different gaps for pages, like the main demo store, it has a big gap on the login page, no gaps on cms pages.
- You would find a breadcrumb created by default for all pages. If you want to have a different breadcrumb for the login page, just create a one.
- Let take a look at the breadcrumb for all pages.
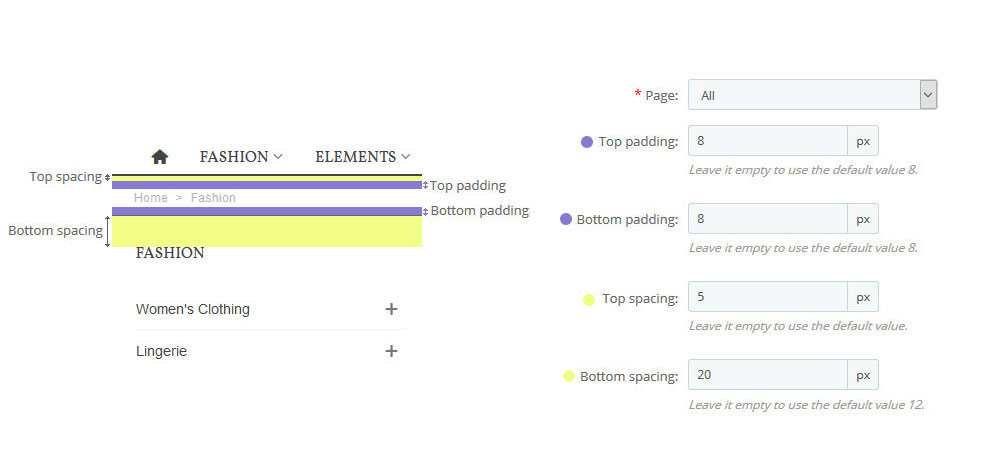
- If you set a background to a breadcrumb, it looks thin, then you need to increase "Top padding" and "Bottom padding".
Advanced custom content
We added a "Advanced content editor" feature to the module, with it you can easily create elements like FAQs, Tabs, Responsive blocks, Icon with text blocks, Text with image blocks, Google maps, etc. The content of element pages (Actually they are CMS pages) on the main demo were created by using the feature.
This gif shows how the feature works, you can use it to create a responsive block and put the block on the homepage or a CMS page or some other places.

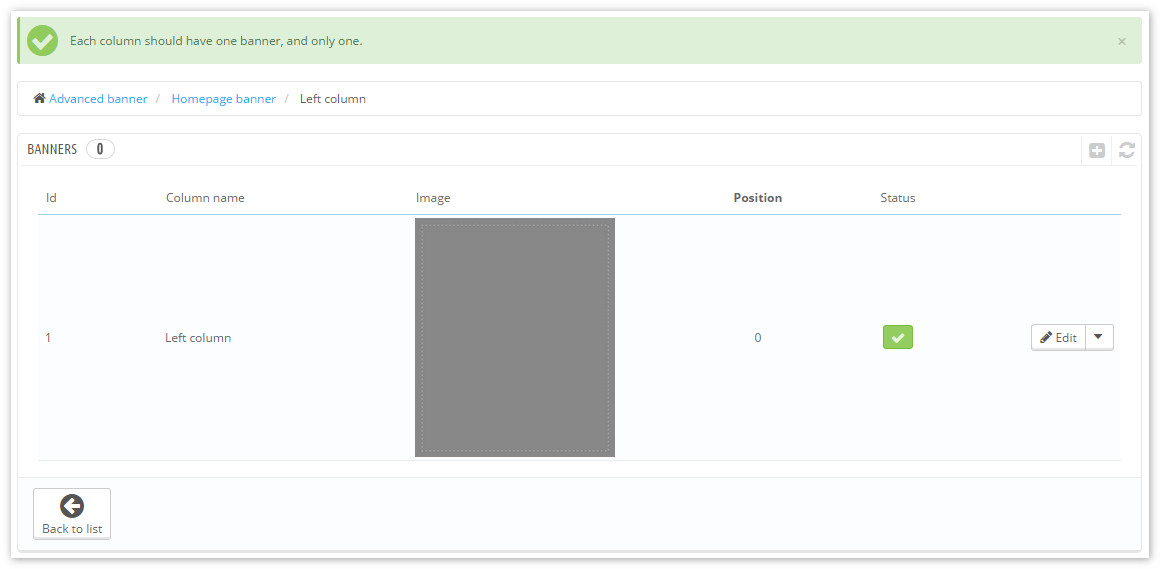
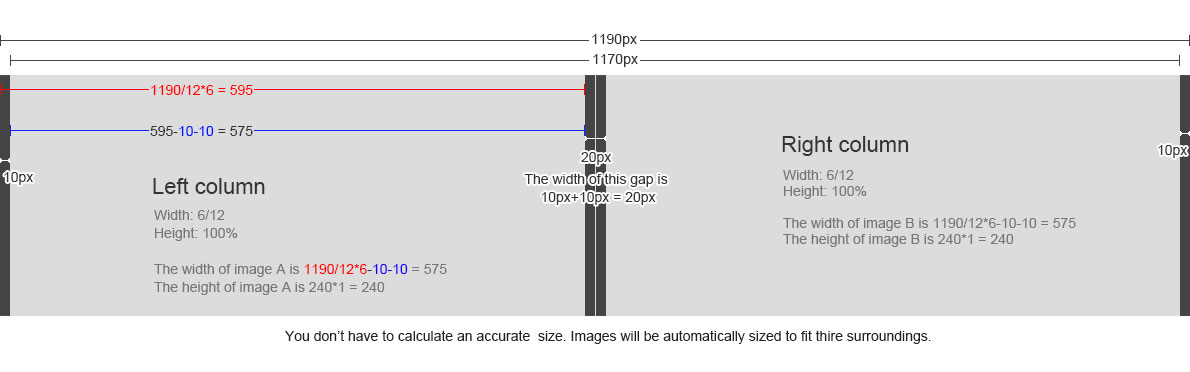
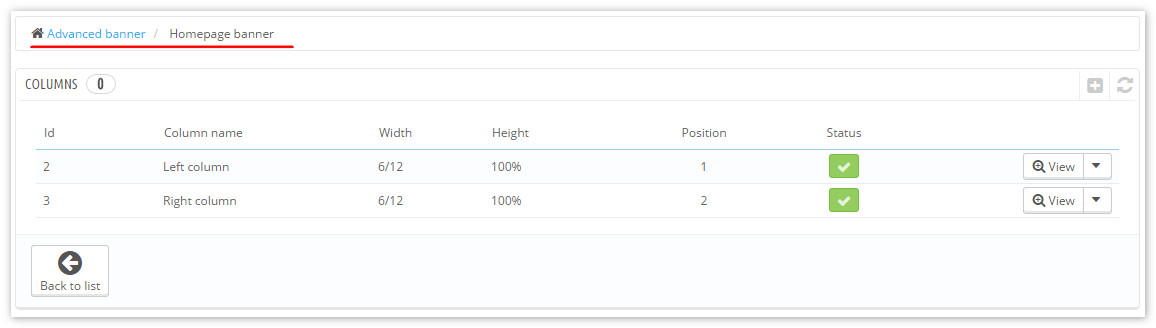
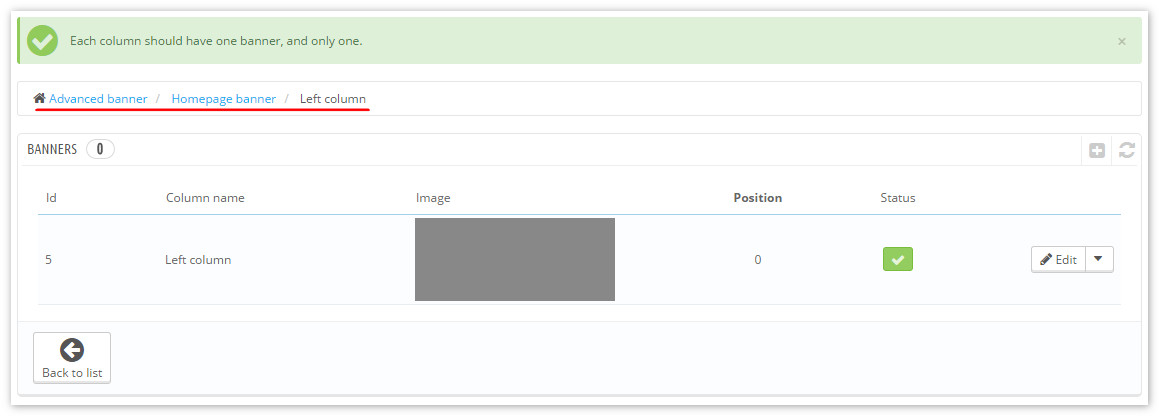
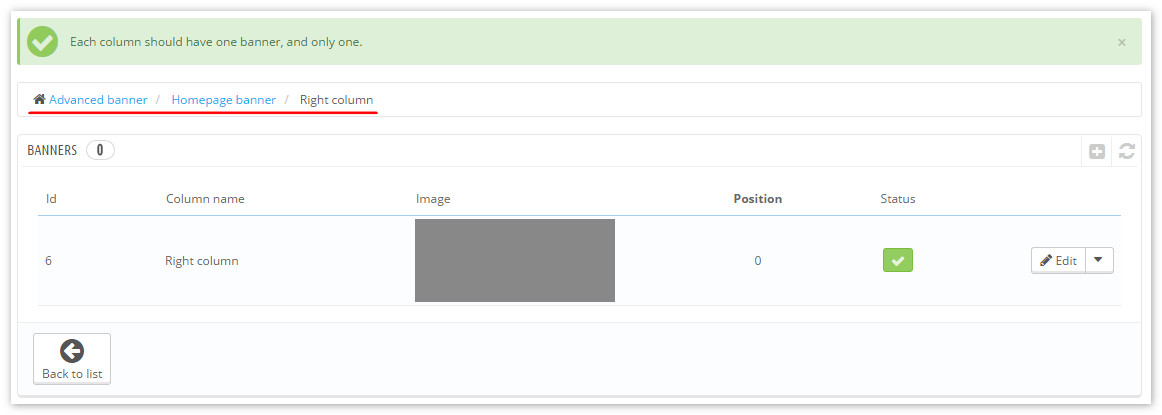
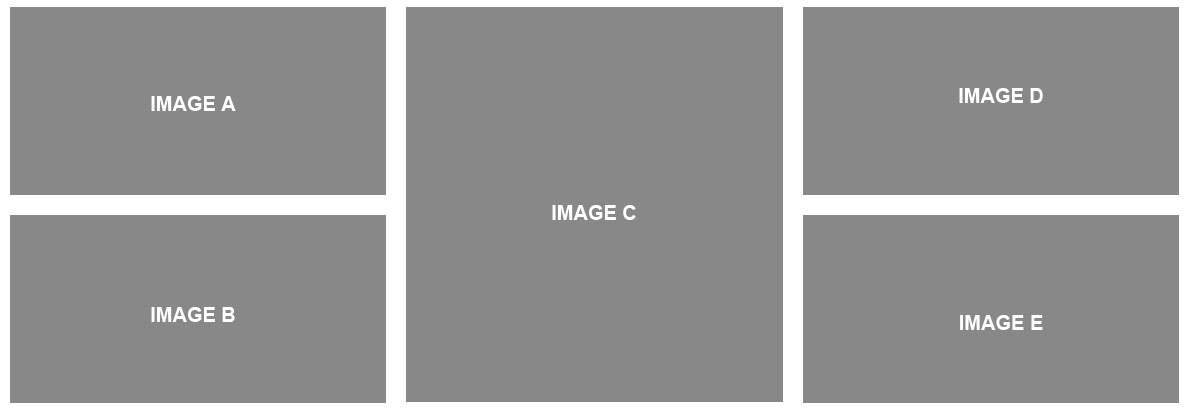
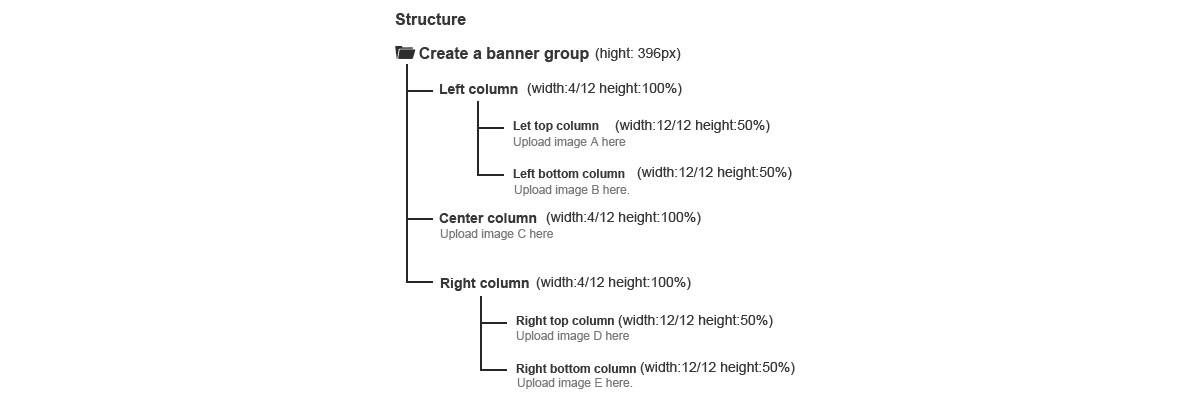
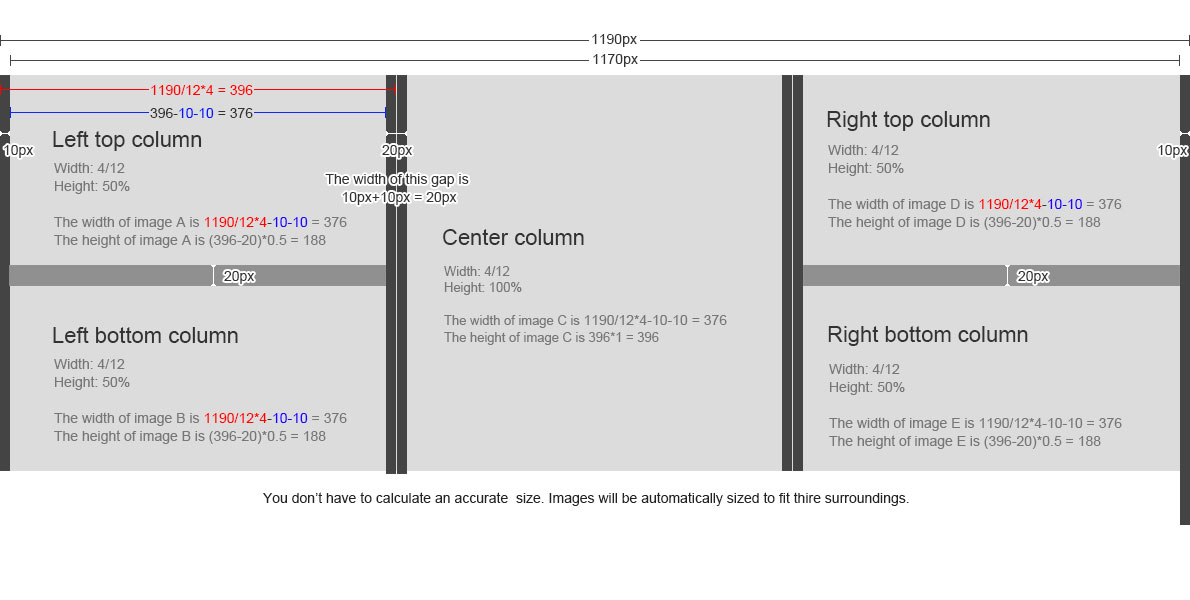
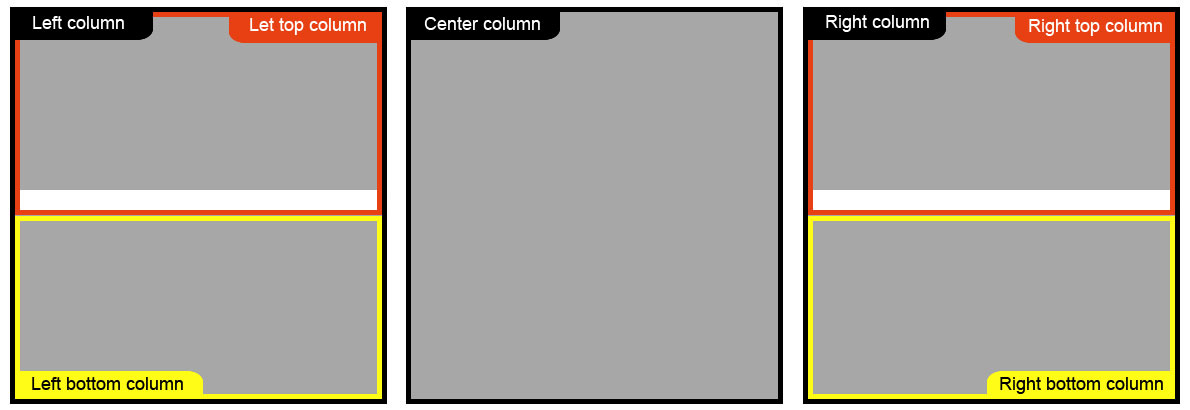
Advanced banner
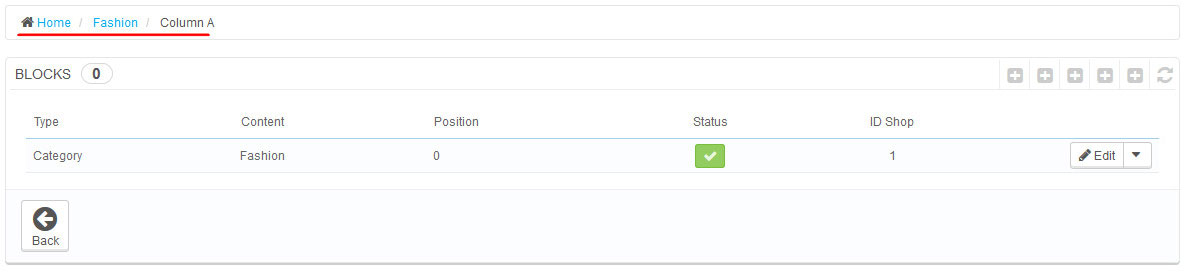
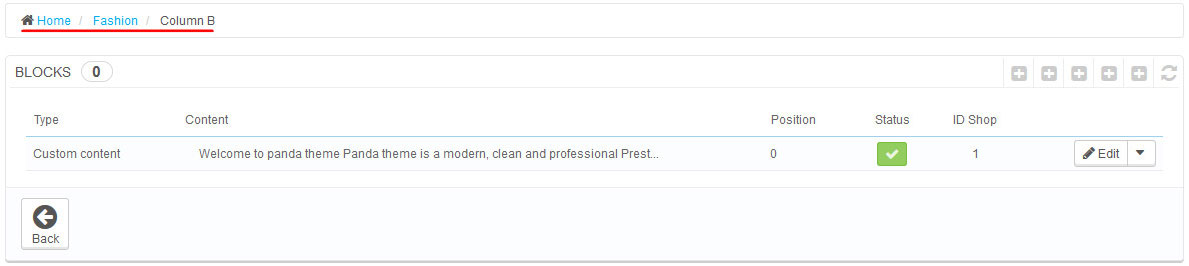
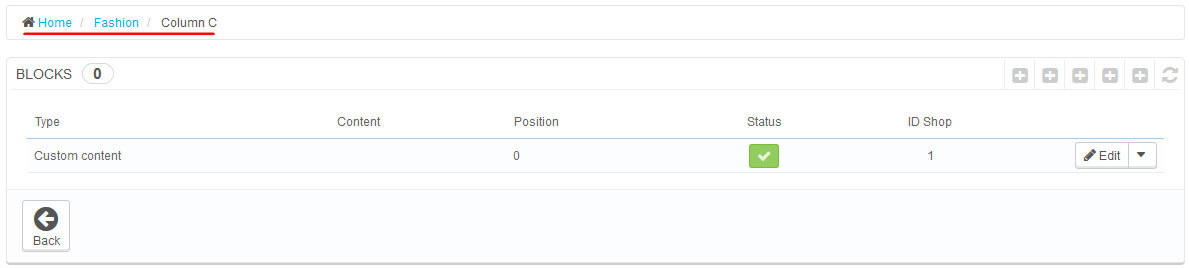
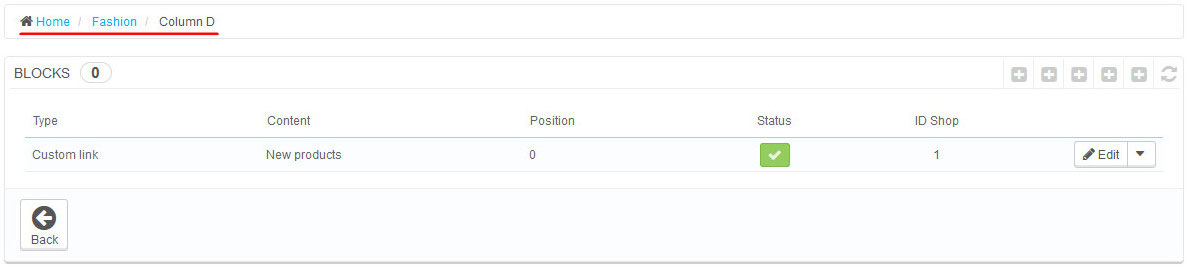
How to build a banner group like this:
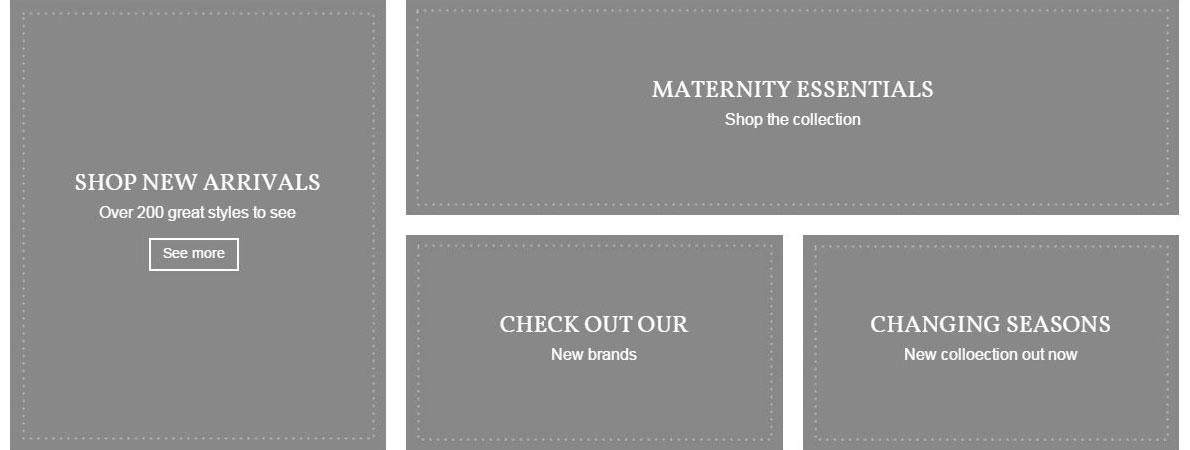

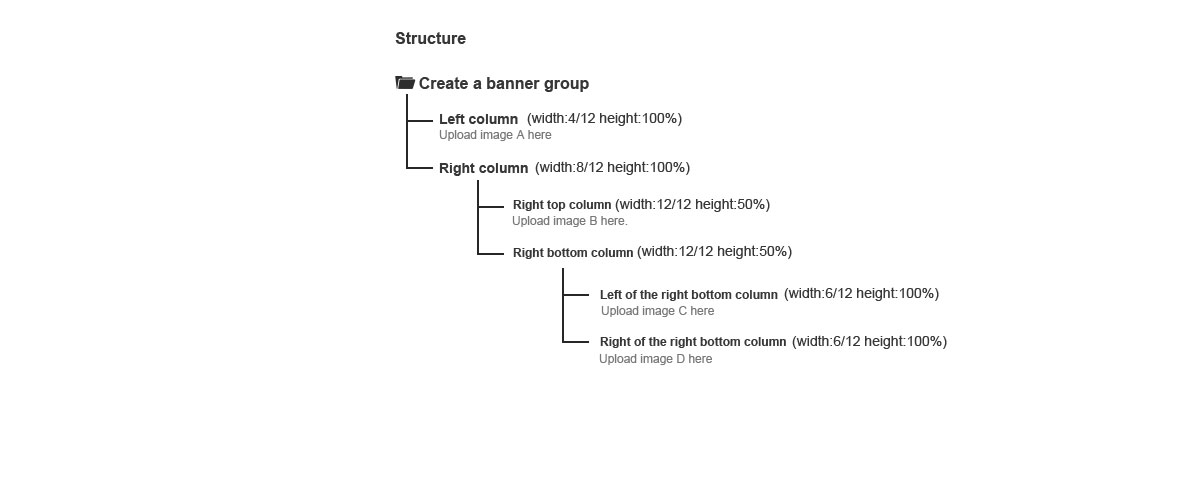
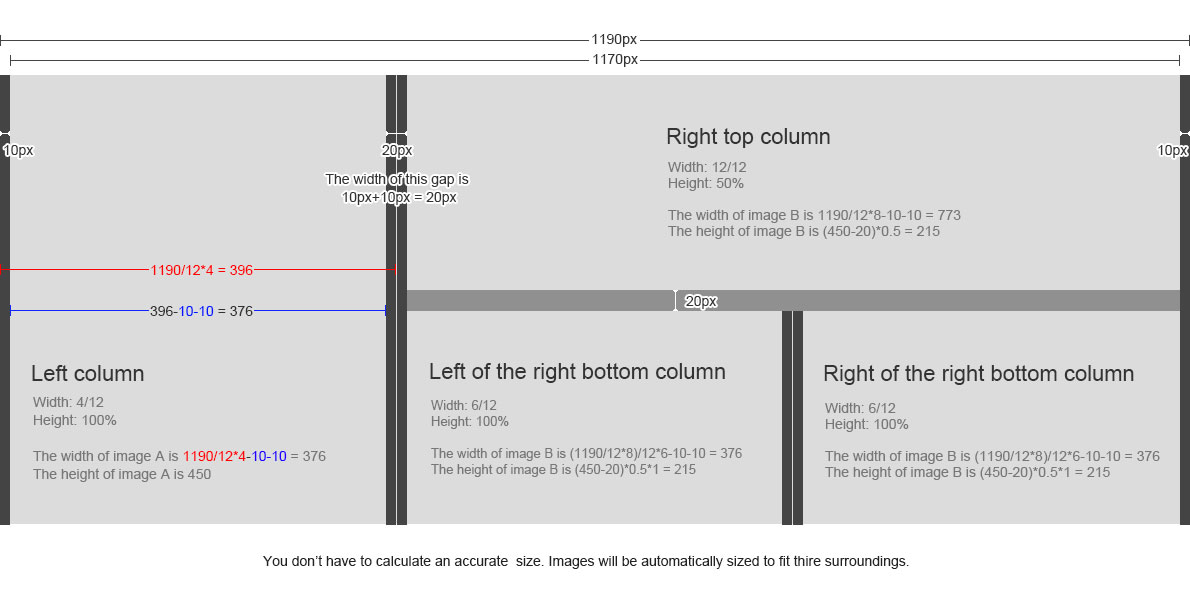
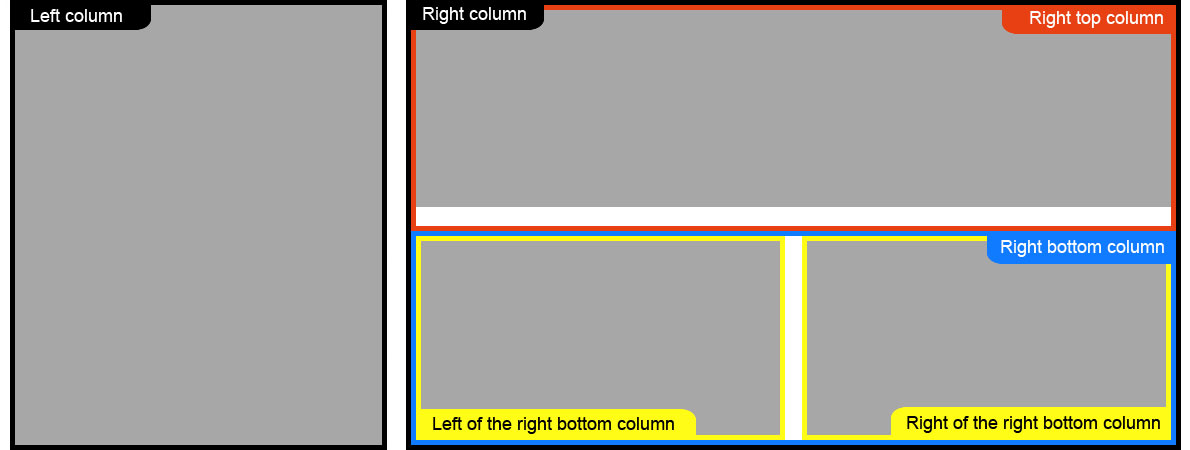


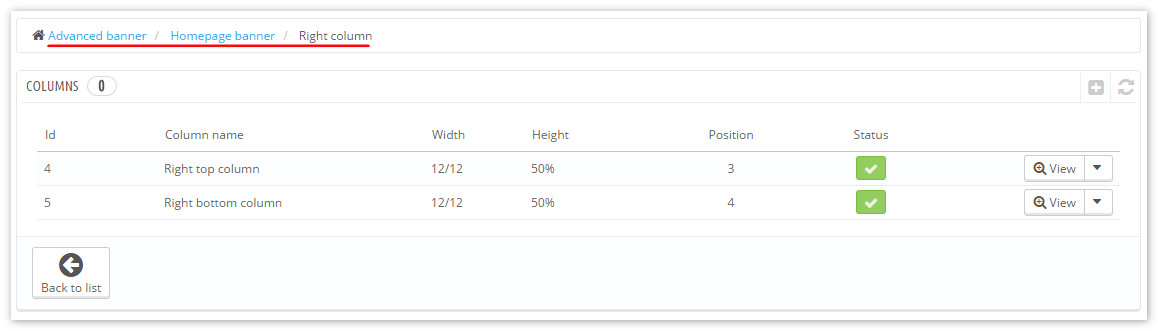
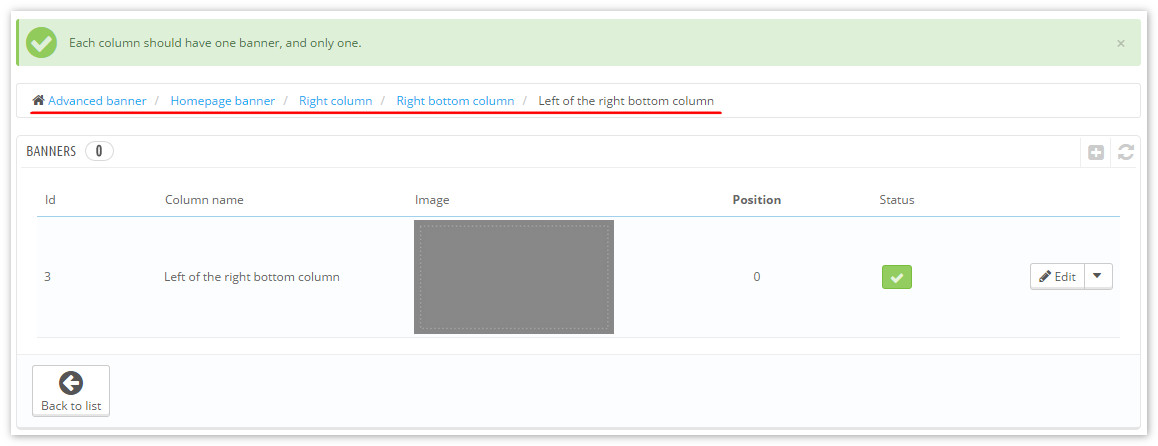
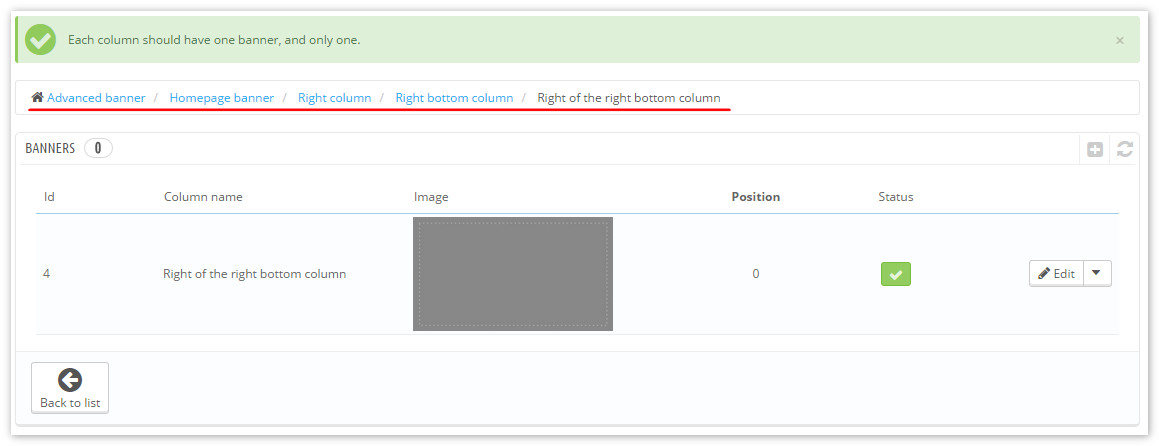
How to build a banner group like this:


How to build a banner group like this:

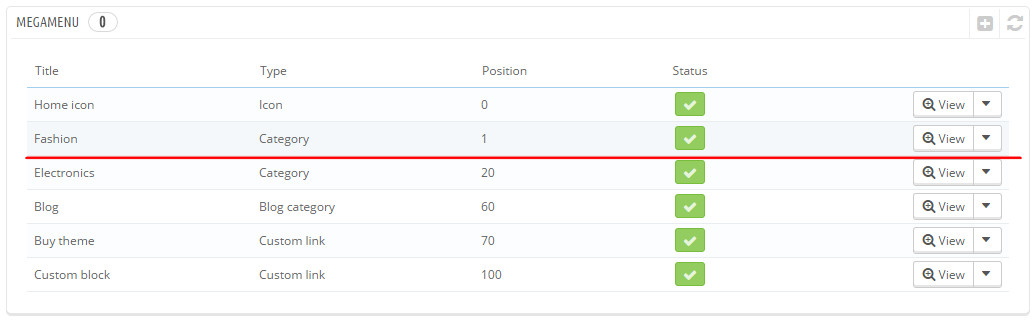
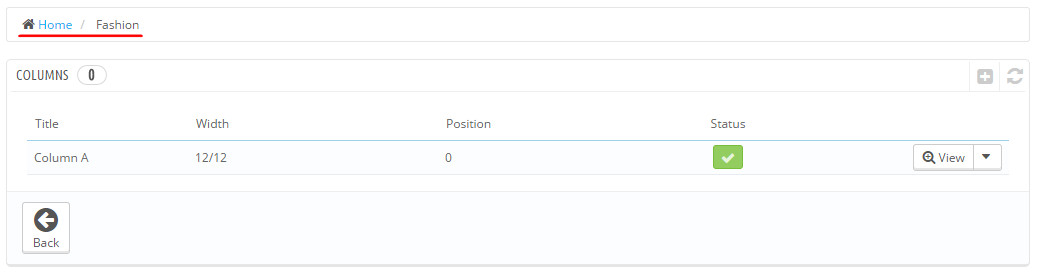
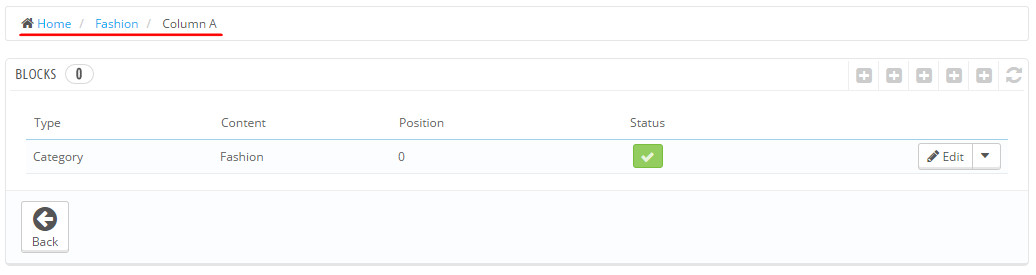
Megamenu
How to build a menu like this:
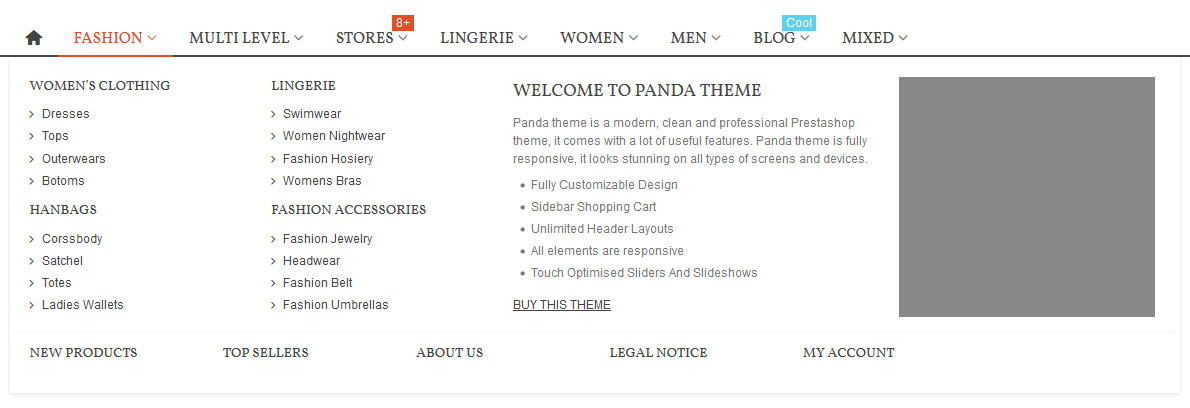

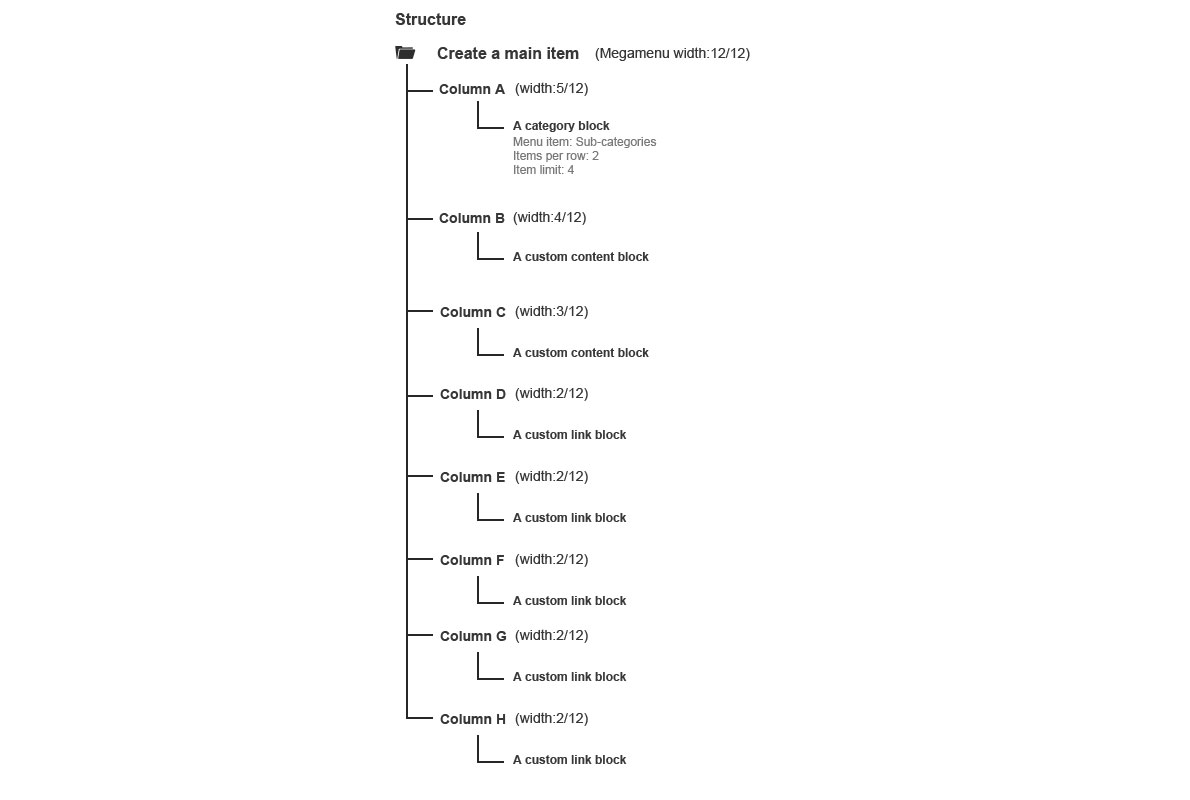
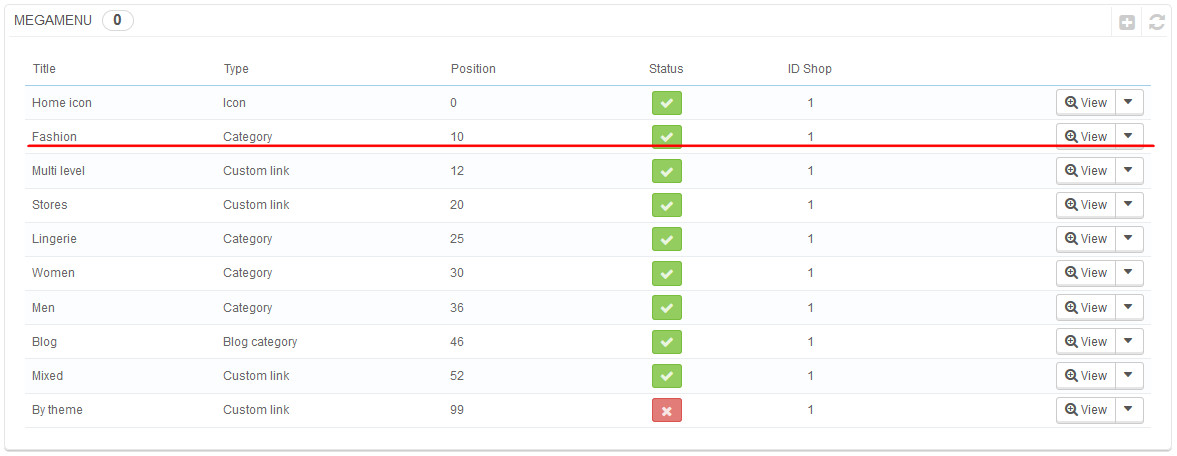
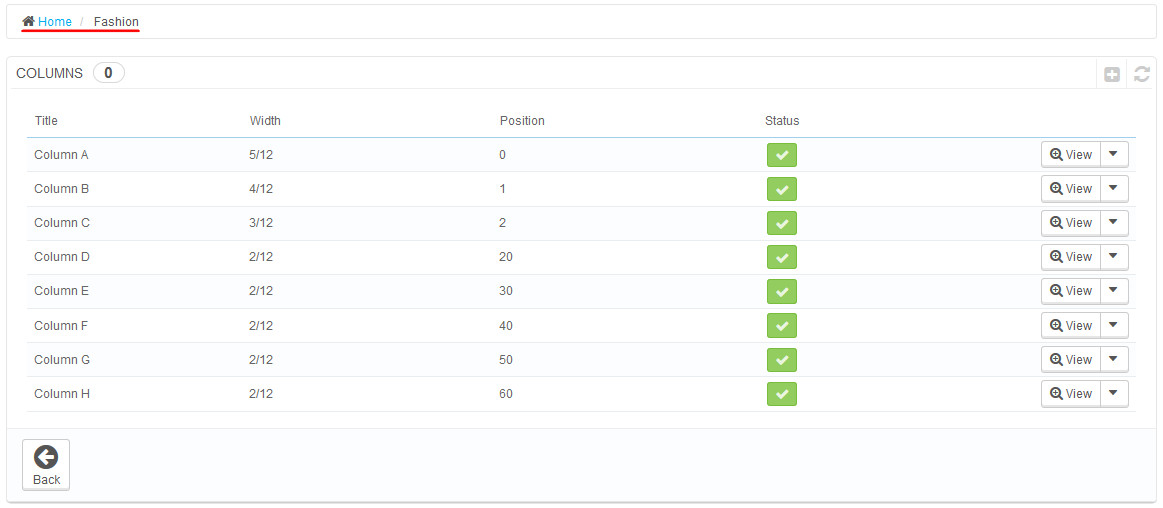
How to build a menu like this:


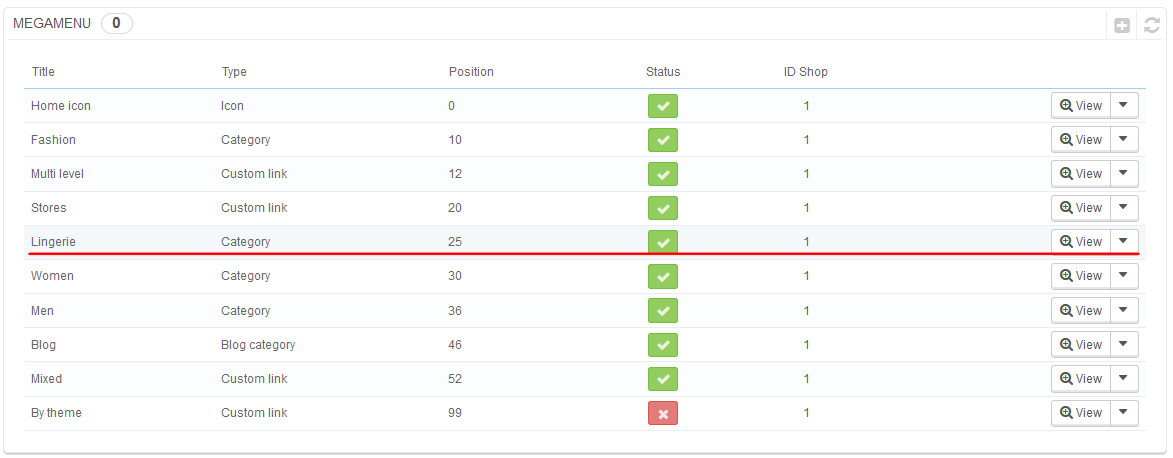
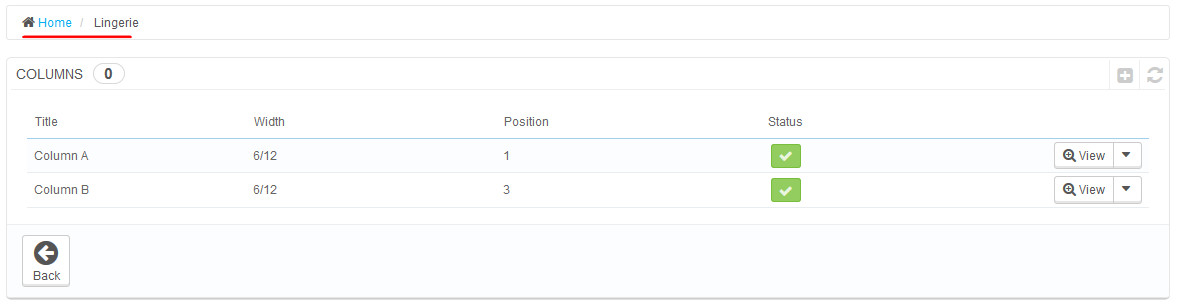
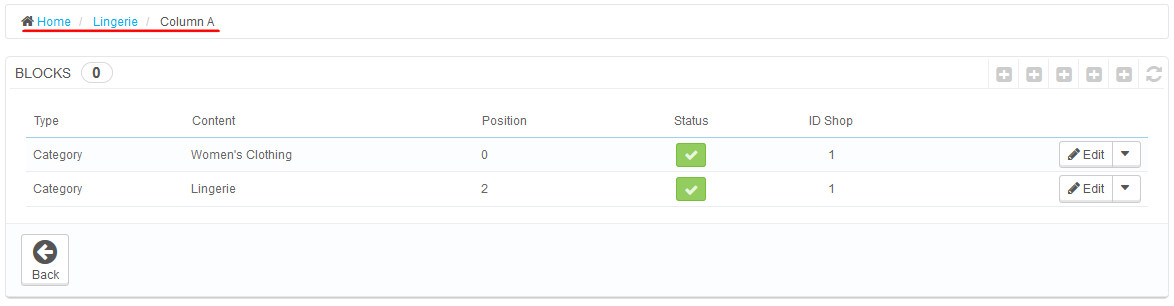
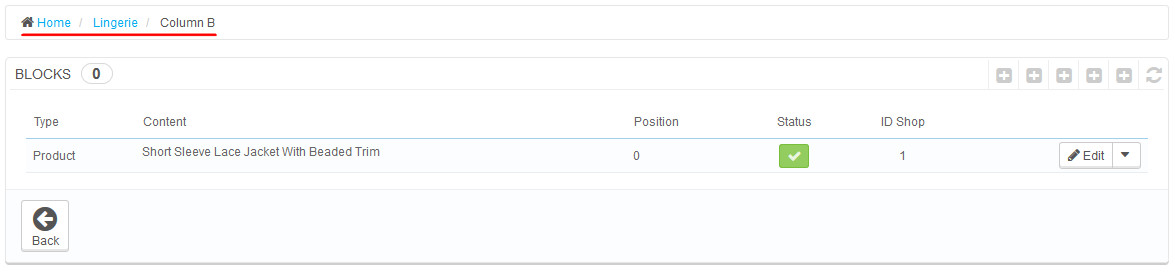
How to build a menu like this:
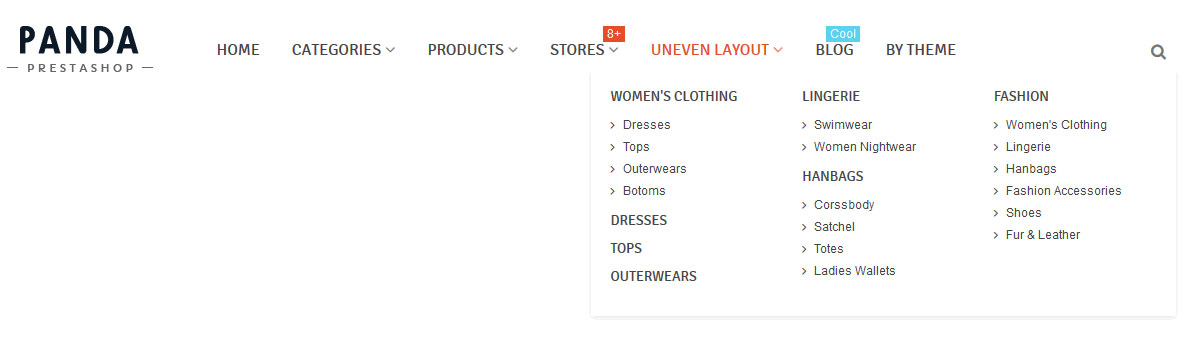
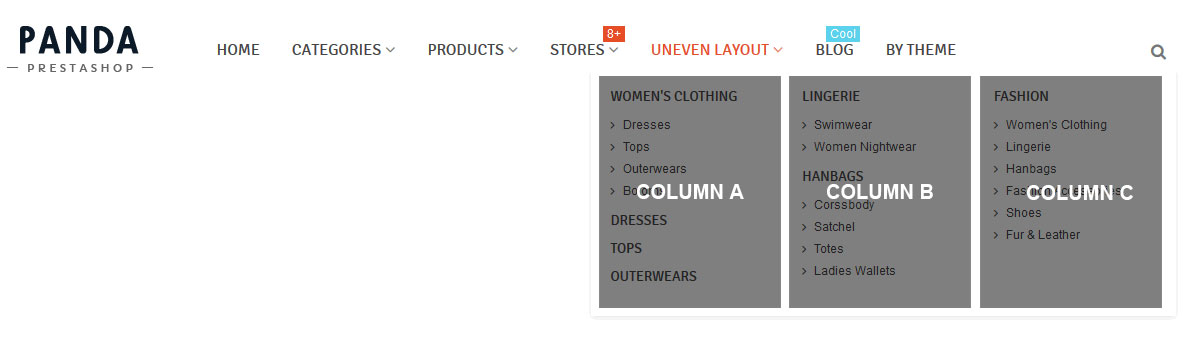
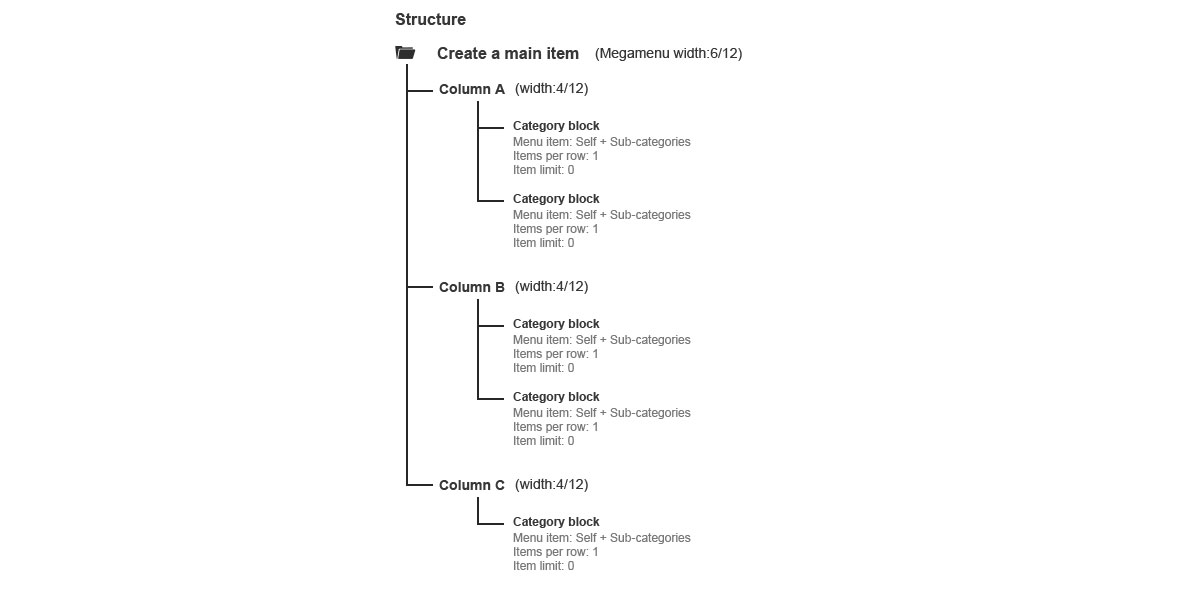

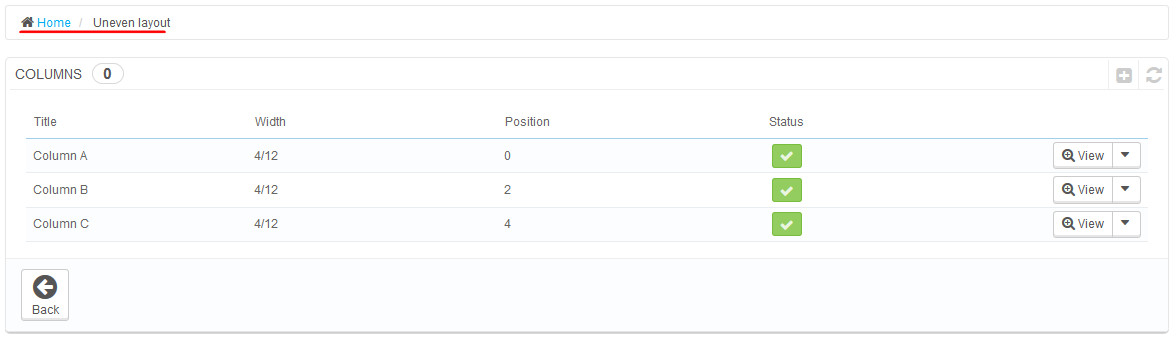
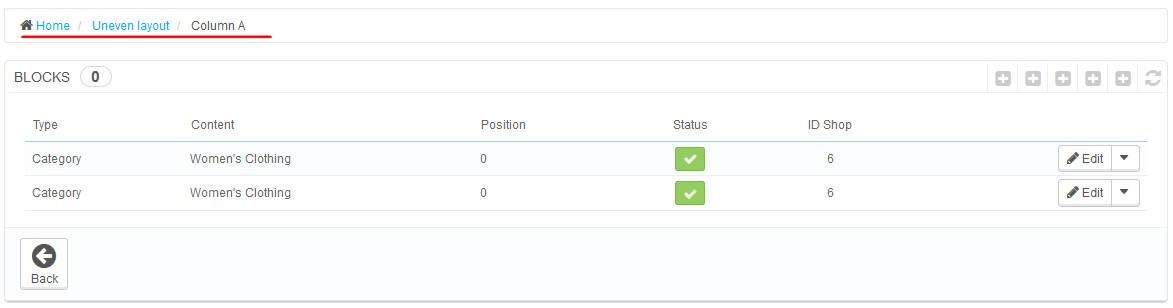


How to build a menu like this:


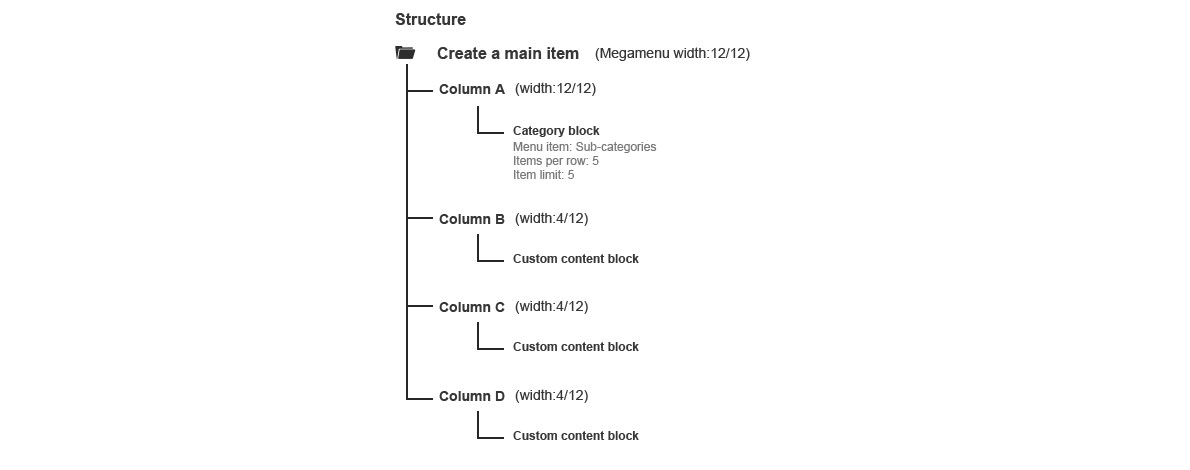
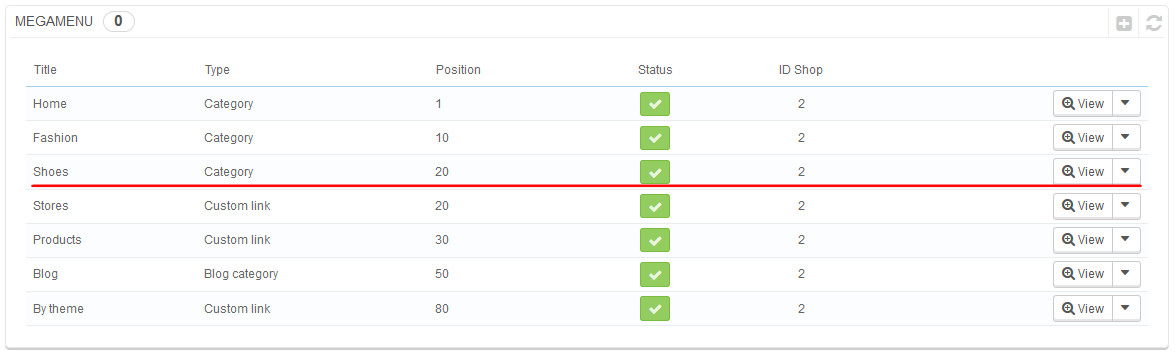
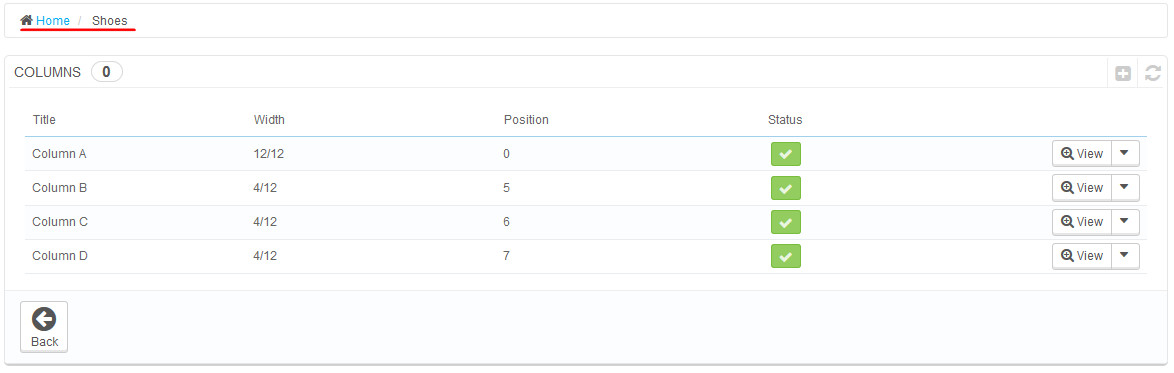
How to build a menu like this:


Layer slider(Deprecated)
- All sample slider are in the /Layer slider/ folder in the main .zip file.
- If you place a layer sldier to "Full width top" or "Full width top 2" or "Full width bottom", and you only want it to be displayed on the homepage, then go to the MISC tab to choose Home+None.

- You can use the "Custom sldier css" field to set a bottom margin to a slider, the default code is
margin-bottom: 0px;. If you want to have a 30px margin, then just change the nubmer to 30.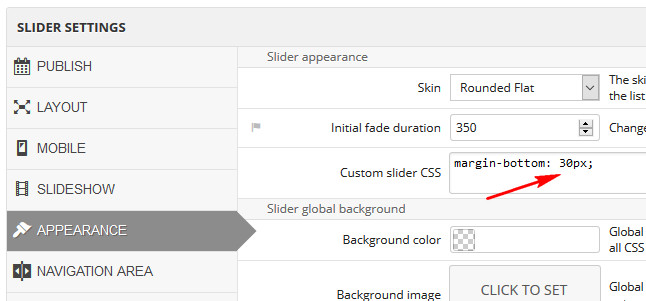
- If your site is in Boxed layout you would better ture of the "Fit to screen" option, you can find it on the "Layout" tab, the option does not show out be default, you need to turn on the "Show advanced settings" opton on the top right hand side first.
Revolution slider
- Revolution slider v5.1.7 for PrestaShop 1.7 is currently a beta version. We created several sliders using it, everything went quite fine, so we included it in the theme. If you find any problems, please let us know.
- It has no big differences with v5.1.6 for PrestaShop 1.6, so the documentaion and sample sliders for v5.1.6 also work for v5.1.7, you can find them in the/Prestashop1.6/Slider revolution v5/ folder.
- You can find an instruction in the \Prestashop1.6\Slider revolution v5\ folder to download sample sliders, you may find previews of them on https://revolution.themepunch.com/examples/. You can also download sliders shared by other people for free here https://revolution.themepunch.com/free-slider-exchange/, filter them by "V5.x".
- This module is not installed by default, if you have problems of installing the module, please refer to the "Why I got an error when installing a 3rd party module" question on this page.
Theme customization
Custom css code
If you want to use custom css code, there are two ways.
- Put your custom css code to the "Custom css code" field in the Theme editor module, recommended.
- If you prefer editing files, then edit the \themes\panda\assets\css\custom.css file.
The same ways also work for custom js code.
Child theme
PrestaShop's child theme feature is not ready yet, but it will be available in future.
How to add a custom font to your site?
- Make sure the font is a web font. A web font should have several files, like .eot, .woff, .ttf and .svg More info here: http://www.w3schools.com/css/css3_fonts.asp
- Upload font files to the /modules/stthemeeditor/views/css/ folder.
- Put the font name into the "Custom fonts" field in the Theme editor moudle.
- You need to put a piece of css code to the "Custom css code" field in the Theme editor moudle. Here is an example
@font-face {
  font-family: 'My font';
  src: url('my_font.eot');
  src: url('my_font.eot#iefix') format('embedded-opentype'),
       url('my_font.woff') format('woff'),
       url('my_font.ttf') format('truetype'),
       url('my_font.svg') format('svg');
  font-weight: normal;
  font-style: normal;
}
Short code feature
Short code feature currently avaiable in these 3 moduels: Advanced Banner, Swiper and Ins. The feature allows you to display blocks from those modules kinda like anywhere you want.
Let me use the Swiper module as an example to show you how to use the feature.
- Copy short codes.

- Paste them into Sourth Code field.
Don't put short codes in any other tags but <div></div>, like these ones are wrong, they might cause your site misplaced.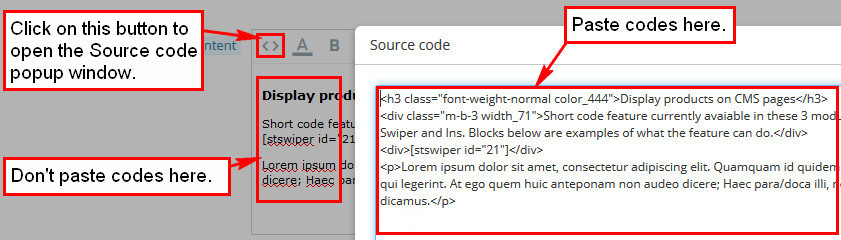
<h3><div>[stswiper id="23"]</div></h3>
<h3>[stswiper id="23"]</h3>
<p><div>[stswiper id="23"]</div></p>
<p>[stswiper id="23"]</p>
<span><div>[stswiper id="23"]</div></span>
<a href="#"><div>[stswiper id="23"]</div></a>
<div>It's okay to use nested div tags<p>[stswiper id="23"]<p></div>
These ones are correct.
<div>[stswiper id="23"]</div>
<div>It's okay to use nested div tags<div>[stswiper id="23"]<div></div>
Theme translation
You can translate This theme using the PrestaShop's new translation system, check it out here. Although PrestaShop team said the new translation system currently did not work for 3rd modules, we figured out a way to make the theme work with the new translation system, cause it's really great.
How to add languages?
Use "Spanish" as an example.
- Go to BO > "International" > "Translations" page > "Modify translations" section > Check if "Spanish" is in the "Select your language" drop down list, if it's in there, which means it already added, you can skip the next step. If it's not in there, do the next step to add it.
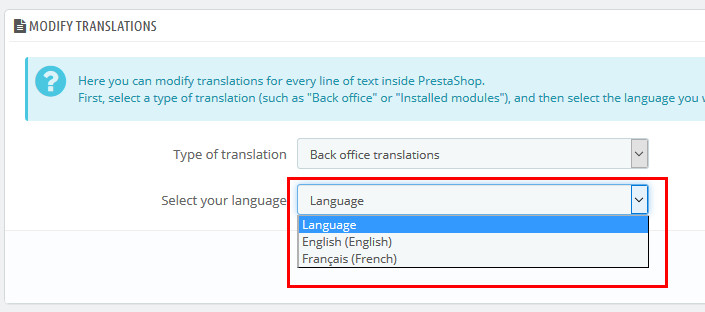
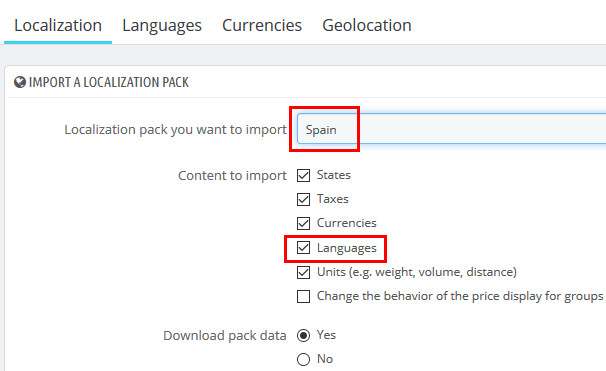
- On the same page you can find a "Add / Update a language" section which can be used to add new languages, but it's not recommended, the best way is adding new languages from the "International" > "Localizatoin" page.
How to translate the theme?
There are two ways to translate the theme. (1) Translate form the back office. (2) Translate on the ST translation tool.
Translate from the back office
Also use "Spanish" as an example.
- Make sure you have Spanish language added on your site.
- To translate the theme, you need to generate translation files first. Use the "Translation files generator" module to generate translation files. If you can not find the module on the "Installed module" list, then go to BO > Modules > You would find the module there, just install it. Go the the module's configuration page, you will find two options, it is recommended to generate translation files for the front office only, because generally we do not need to translate the back office, another reason is that the back office has 2000+ phrases, way better more than the front office's 300+ phrases, those 2000+ phrases would slow the translation page down. Don't worry about losing your translations when regenrating translatoin files, your translations are stored in database, they are safe.
- Translation fiels are stored in the /themes/panda/translations/ folder. If you have problem of generating files, please check if the folder has write permission.
- After generating translation files, go to BO > "International" > "Translations" page > "Modify translations" section > Select "Theme translations" + "Panda" + "Spanish", we use Spansih as an example, so we select it here.
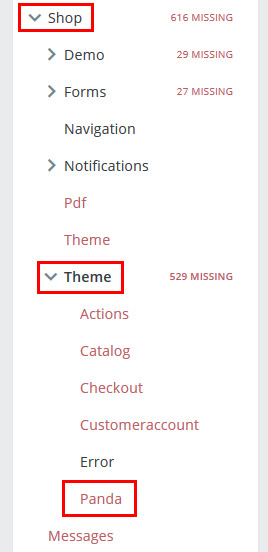
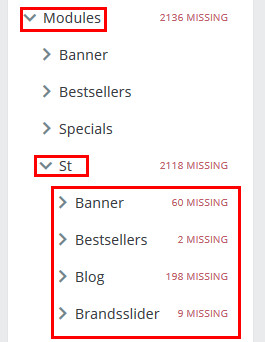
- To translate the front office, locate to "Shop" > "Theme" > "Panda". Here you can translate all phrases displaying on the font office which includes phrases from modules and phrases from files in the /themes/panda/ folder.
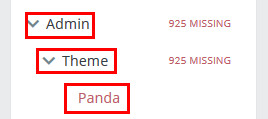
- To translate the back office, locate to "Admin" > "Theme" > "Panda" and "Modules" > "St". Why translate the back office from two different places, because of phrases on the "Admin" > "Theme" > "Panda" are common phrases, they are used by more than one module, you just need to translate them for once here.
- Don't modify translation files manually, your modifications will be overridden when regenerating files.
- Your translations saved in database, so don't worry about losing them when regenerating files.
- Clear the Smarty cache to see the result.
Translate on the ST translation tool(Recommended)
ST translation tool is used to translate the front office and back office of Panda 2, the advantage of using it is that you can share your translations with others and use others translations.
Also use "Spanish" as an example.
- Make sure you have Spanish language added on your site.
- http://panda2.sunnytoo.com/en/module/sttranslation/list?tpn=Panda2
- After translating or the translation you are looking for has already translated, then download the translation file.
- Upload .xlf file(s) in the downloaded .zip file to your site, we are using Spanish as an example, so check if there is a folder named "es-ES" in /themes/panda/translations/ folder, create one if there is not. Then upload .xlf file(s) into the "es-ES" folder. You can find a list of ISO language code here http://www.lingoes.net/en/translator/langcode.htm
- Clear the Smarty cache.
- That's all. If you want to change some translations, you can still use the back office to make changes. You won't lose your changes once you update the file.
Two ways to get support
1. (NEW & RECOMMENDED) Create a support topic on our support forum to explain questions http://www.sunnytoo.com/forums/forum/panda-theme/. This is RECOMMENDED, because 1) You may find the same questions you are going to ask are already there and they have been solved. 2) Since people can response to each other on the support forum, so you may get help from other people to get problems fixed quick.
2. Contact via the contact form on this page http://www.sunnytoo.com/forums/forum/panda-theme/ Please be specific so we can help you as quickly as possible. We typically reply back within 48 hours. E-mail: helloleemj@gmail.com